Cannoli Cones are the perfect way to enjoy classic Italian flavors without the hassle of frying pastry shells. These handheld treats combine a light, spiced ricotta filling with the satisfying crunch of a chocolate-dipped waffle cone.
This recipe simplifies a traditional dessert by using store-bought waffle cones as the base. By focusing on a high-quality, whipped ricotta and cream cheese filling, you get that familiar, rich texture in every bite. It is an ideal dessert for parties or when you want something sweet that is easy to assemble.
Ingredient Notes
Ricotta: Use whole-milk ricotta for the best flavor and texture.
Cream Cheese: Make sure it is fully softened to room temperature so it blends smoothly without lumps.
Waffle Cones: Sugar or waffle cones both work well; just ensure they are fresh and crisp.
Cannoli Cones
Cannoli Cones
These delightful treats feature a creamy, spiced ricotta filling piped into crunchy, chocolate-dipped waffle cones for a fun twist on a classic Italian dessert.
Dip the rim of each cone into the melted chocolate and set them upright in tall glasses or a stand until the chocolate hardens.
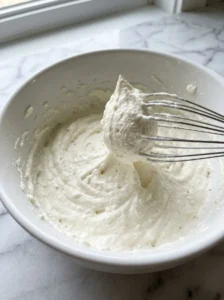
Combine the ricotta, cream cheese, powdered sugar, and cinnamon in a large mixing bowl and beat until the mixture is completely smooth.
Pour the heavy cream into the bowl and continue to beat the mixture on medium-high speed until it becomes light, fluffy, and holds stiff peaks.
Gently fold the mini chocolate chips into the cream mixture using a spatula.
Transfer the filling into a piping bag fitted with a large tip and pipe the mixture into the prepared cones just before serving.
Keyword Cannoli Cones
Tima’s Tips
For the smoothest filling, press the ricotta through a fine-mesh sieve before mixing it with the cream cheese.
Keep the cones and the filling separate in the refrigerator until you are ready to serve to ensure the cones stay crisp.
Variations
Add a teaspoon of orange zest to the filling for a bright, citrusy flavor.
Roll the chocolate-dipped rims in crushed pistachios before the chocolate sets.
Swap the mini chocolate chips for chopped candied fruit for a more traditional profile.
Storage
Store the filling in an airtight container in the refrigerator for up to two days. Keep the cones in their original packaging at room temperature, and only assemble the Cannoli Cones right before you serve them.
Common Questions I Get
Can I make the filling ahead of time?
Yes, you can prepare the filling and store it in the refrigerator for up to two days, but wait to pipe it into the cones until just before serving.
What kind of cones should I use?
Either sugar cones or waffle cones work perfectly for this recipe, as long as they are fresh and crisp.
Do I need a special piping tip?
A large round or star piping tip works best to ensure the mini chocolate chips can pass through without clogging the bag.
If you make this, let me know how it turned out in the comments below — I’d love to hear from you.
Tima
I’m Tima Miller, a self-taught cook and author of the Simple Yummy cookbook series. Every recipe here is tested, clearly written, and designed to work in a real home kitchen.