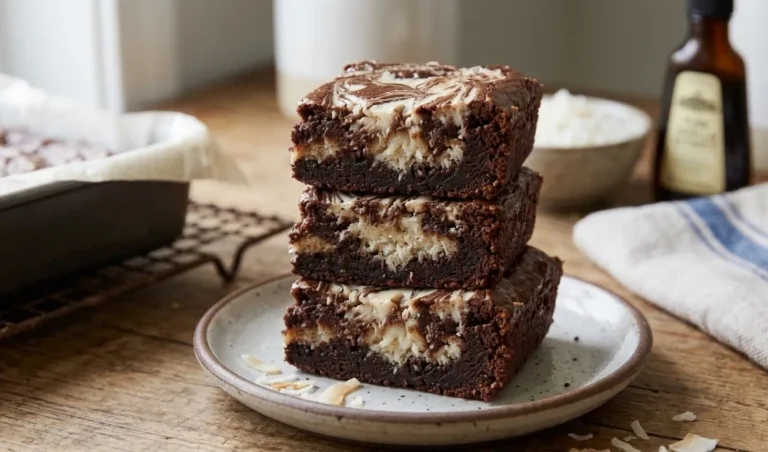
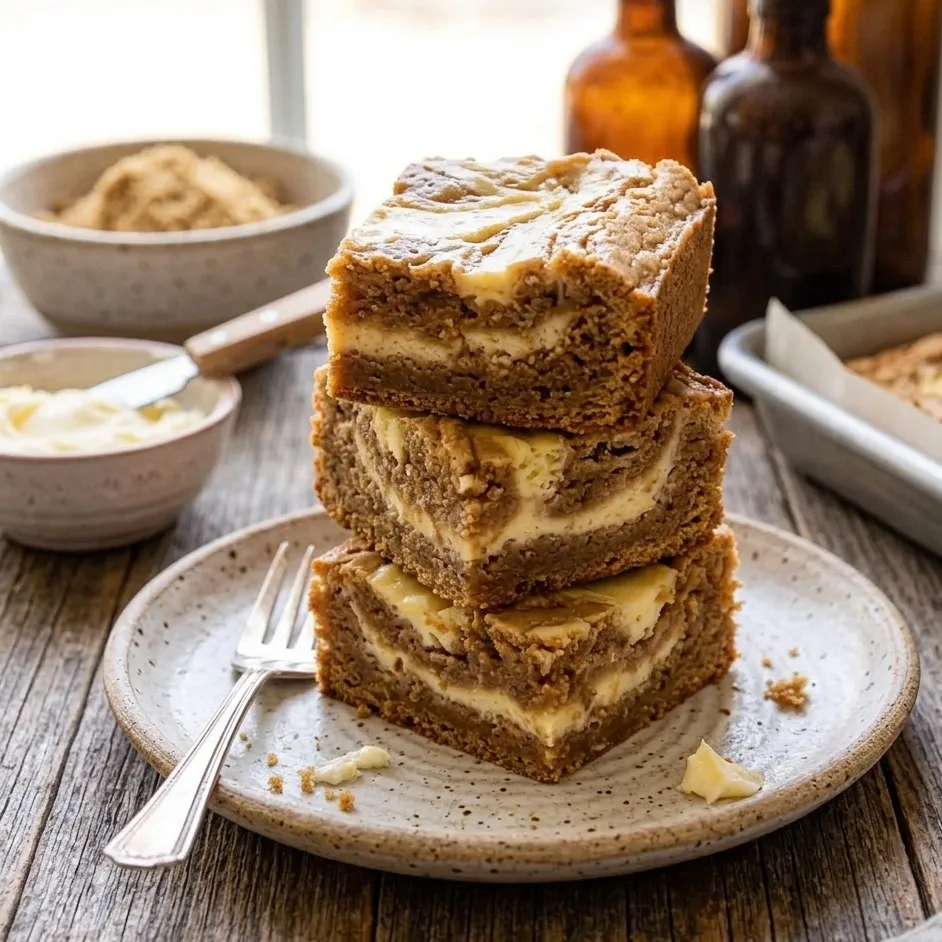
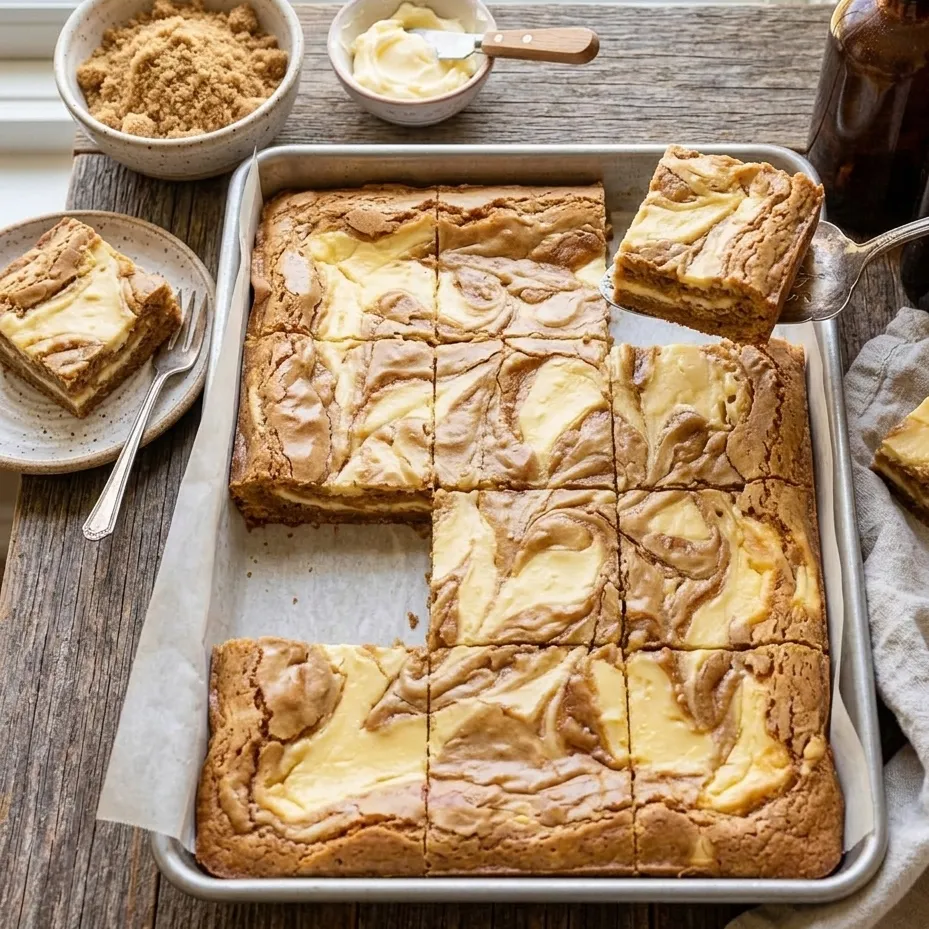
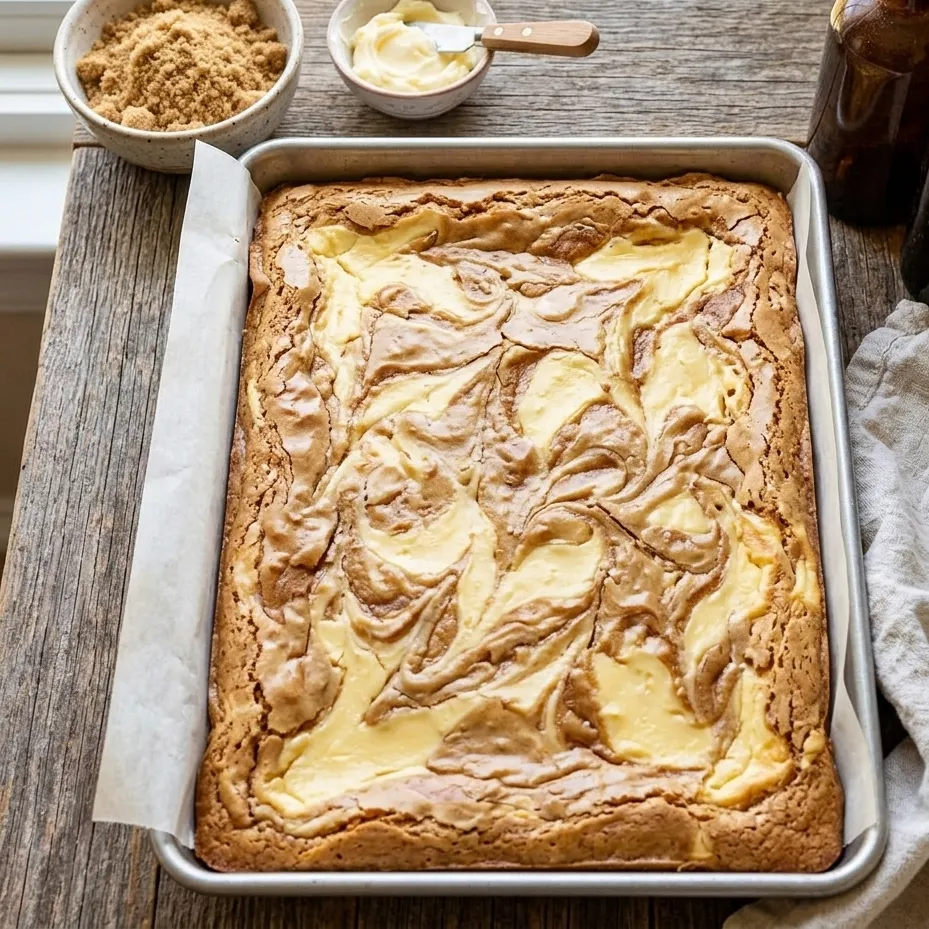
Cream Cheese Swirl Blondies
Okay, let’s bake up some Cream Cheese Swirl Blondies!
Ever have one of those days where you just need a little something sweet? Well, I do, like, pretty much all the time! That’s why I love baking. And let me tell you, these Cream Cheese Swirl Blondies are my new obsession. They’re seriously the best of both worlds: a yummy, cakey blondie base with a creamy, tangy swirl of cream cheese.
Ready to get baking? I know I am!
Why I Love This Cream Cheese Swirl Blondies
The first time I made these Cream Cheese Swirl Blondies, it was kind of an accident. I was trying to make regular blondies, but I had some cream cheese in the fridge that I needed to use.
So, I thought, “Why not?” The result? Amazing! Honestly, these have become my go-to when I need something easy but also totally delicious. They’re also perfect for sharing with friends and family. My family is always asking me to make them.
They’re that good! It’s like a little slice of happiness in every bite, and I’m so excited to share the recipe with you.

Ingredients for Cream Cheese Swirl Blondies
Okay, let’s gather our goodies! Don’t worry, it’s not a long list and you probably already have most of this stuff. Here’s what you’ll need for these awesome Cream Cheese Swirl Blondies:
Blondie Batter:
- 10 tbsp unsalted butter, softened (plus extra for greasing the pan)
- 1 ¾ cups all-purpose flour, divided
- 1 tsp baking powder
- ½ tsp fine sea salt
- ¾ cup packed light brown sugar
- 2 large eggs, room temperature
- 1 ½ tsp pure vanilla extract
Cream Cheese Swirl:
- 6 oz cream cheese, softened
- ¼ cup granulated sugar
- 2 tbsp unsalted butter, softened
- 1 egg, room temperature
- ½ tsp pure vanilla extract
You’ll also need an 8-inch square baking pan and some parchment paper. I also love using a hand mixer, but a stand mixer is great too. Don’t have either? You can use a good old fork or whisk!
How to Make Cream Cheese Swirl Blondies
Now for the fun part – baking! I promise, these steps are super simple, even if you’re new to baking.
- Preheat & Prep: First things first, let’s get that oven ready! Set it to 325°F (that’s about 160°C). Now, grease your 8-inch square baking pan with a little butter. Then, line it with parchment paper, letting the paper hang over the sides a little – this makes it easy to lift the blondies out later. Grease the parchment a little too!
- Mix the Dry Stuff: In a medium bowl, whisk together 1 ½ cups of the flour, the baking powder, and the salt. This helps make sure everything is mixed evenly.
- Make the Blondie Batter: In a bigger bowl, use your mixer to cream together the 10 tablespoons of softened butter and the brown sugar. Beat them until they look light and fluffy – this should take about 3 minutes. Then add in the eggs one at a time. Don’t forget to mix well after each egg! Then, add the 1 ½ teaspoons of vanilla extract. Finally, gently stir in the dry ingredients until everything just comes together, don’t overmix.
- Make that Cream Cheese Swirl: In a separate bowl (make sure it’s nice and clean), beat together the softened cream cheese, granulated sugar, 2 tbsp of butter, the remaining ¼ cup of flour, 1 egg, and ½ teaspoon of vanilla. Mix until it’s super smooth and creamy.
- Assemble the Blondies: Spread half of the blondie batter into your prepared pan. Next, plop about two-thirds of the cream cheese mixture over the blondie batter and spread it. Now, spoon the remaining blondie batter on top and smooth it out a bit. Use small dollops to finish with the remaining cream cheese mixture.
- Create a Beautiful Swirl: Now for the fun part! Take a butter knife and swirl the cream cheese mixture through the blondie batter. I like to run the knife across, up, and down so that it gets nice and swirly!
- Bake to Perfection: Pop your pan into the preheated oven and bake for 40–45 minutes. The top should be golden brown, and if you stick a toothpick in the middle, it should come out with just a few crumbs, not wet batter.
- Cool and Enjoy: Let the blondies cool in the pan for about 15 minutes, then lift them out using the parchment paper overhang. Put them on a wire rack and let them cool completely before you cut them into squares. Trust me, this is worth the wait!
Making It Extra Special
These Cream Cheese Swirl Blondies are amazing on their own, but you know I always have ideas on how to make them even better! I love them with a big scoop of vanilla ice cream. Oh my goodness, it’s so good. They’re also perfect with a cup of hot coffee or tea for a cozy night in. And if you’re feeling a little fancy, a drizzle of melted chocolate or caramel sauce over the top never hurts! And, a few fresh berries would be great!
Common Questions I Get
Can I make these ahead of time?
Absolutely! These blondies actually taste great the next day. Just keep them in an airtight container at room temperature.
Can I substitute the brown sugar for regular sugar?
You could, but the brown sugar really adds a nice depth of flavor. It helps them stay moist and gives them a richer taste, so, I really suggest sticking with the brown sugar if you can.
Can I use a different kind of flour?
Yes, you can try a gluten-free 1:1 flour blend if you need a gluten-free option.
Final Thoughts on These Cream Cheese Swirl Blondies
Okay, so, that’s it! I hope you love making these Cream Cheese Swirl Blondies as much as I do! They really are so easy and perfect for just about any occasion. I can’t wait to hear how they turn out for you. Don’t be afraid to try it, and let me know what you think! Happy baking!

Cream Cheese Swirl Blondies
Ingredients
- Blondie Batter:
- 10 tbsp unsalted butter softened (plus extra for greasing the pan)
- 1 ¾ cups all-purpose flour divided
- 1 tsp baking powder
- ½ tsp fine sea salt
- ¾ cup packed light brown sugar
- 2 large eggs room temperature
- 1 ½ tsp pure vanilla extract
- Cream Cheese Swirl:
- 6 oz cream cheese softened
- ¼ cup granulated sugar
- 2 tbsp unsalted butter softened
- 1 egg room temperature
- ½ tsp pure vanilla extract
Instructions
- Preheat & Prep: First things first, let’s get that oven ready! Set it to 325°F (that’s about 160°C). Now, grease your 8-inch square baking pan with a little butter. Then, line it with parchment paper, letting the paper hang over the sides a little – this makes it easy to lift the blondies out later. Grease the parchment a little too!
- Mix the Dry Stuff: In a medium bowl, whisk together 1 ½ cups of the flour, the baking powder, and the salt. This helps make sure everything is mixed evenly.
- Make the Blondie Batter: In a bigger bowl, use your mixer to cream together the 10 tablespoons of softened butter and the brown sugar. Beat them until they look light and fluffy – this should take about 3 minutes. Then add in the eggs one at a time. Don’t forget to mix well after each egg! Then, add the 1 ½ teaspoons of vanilla extract. Finally, gently stir in the dry ingredients until everything just comes together, don’t overmix.
- Make that Cream Cheese Swirl: In a separate bowl (make sure it’s nice and clean), beat together the softened cream cheese, granulated sugar, 2 tbsp of butter, the remaining ¼ cup of flour, 1 egg, and ½ teaspoon of vanilla. Mix until it’s super smooth and creamy.
- Assemble the Blondies: Spread half of the blondie batter into your prepared pan. Next, plop about two-thirds of the cream cheese mixture over the blondie batter and spread it. Now, spoon the remaining blondie batter on top and smooth it out a bit. Use small dollops to finish with the remaining cream cheese mixture.
- Create a Beautiful Swirl: Now for the fun part! Take a butter knife and swirl the cream cheese mixture through the blondie batter. I like to run the knife across, up, and down so that it gets nice and swirly!
- Bake to Perfection: Pop your pan into the preheated oven and bake for 40–45 minutes. The top should be golden brown, and if you stick a toothpick in the middle, it should come out with just a few crumbs, not wet batter.
- Cool and Enjoy: Let the blondies cool in the pan for about 15 minutes, then lift them out using the parchment paper overhang. Put them on a wire rack and let them cool completely before you cut them into squares. Trust me, this is worth the wait!